GIMP Tips
GIMP is a free and open source image manipulation software. I only use a small subset of functions of the software. Here are some tips I keep a record for myself.
Move Pixels In An Area
Ctrl + Alt + Move Selection is the shortcut to move selected area of an image.
GIMP adds a “Floating selection” temporary layer in the layer dialog. After you
make the change, click the mouse in another area to confirm the move. The
temporary layer merges onto the main layer.
Add White Background After Deleting An Area
Sometimes GIMP leaves a hole on an image when you delete the pixels in an area.
Choose menu item Layer > Transparency > Remove Alpha Channel and the area
will show white background.
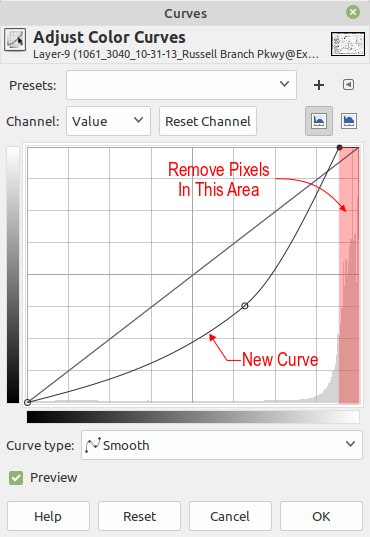
Remove Background Grey Hue
Some scanned image file has a grey hue on the background. The Colors >
Curves tool can be used to remove the background.
Resize Image to a Certain Size
If you want to resize a scanned plan image file to a certain size such as Arch D (36” x 24”), you can follow those steps (revised on 10/30/2020).
- Select an area on the image and use
Image>Crop to Selectionto crop to the selected area. - Choose menu item
Image>Scale Image, and lock theWidthandHeightratio on the dialog box, and enter the width or height to desired width (e.g., 36”) or desired height. If you enter the width 36” in this step, the height should be less than 24”. - Click menu item
Image>Canvas Size, and unlock the ratio. Resize the canvas size to the final size such as 36” x 24”. Also click theCenterbutton on the dialog box. - The image will have some transparent areas on the top and bottom, or
on the left and right. On the layer panel, add a new layer and choose
Layer Fill TypevalueWhite. Put this new layer below the existing layer and merge the existing layer down.
Reduce File Size
When you have a grayscale image saved in RGB (color) mode, the file size would be
higher than in Grayscale mode. The size of exported PNG file is reduced to 4.02 mb from
9.49 mb when the mode is changed from RGB to Grayscale. You can reduce the file
size further by saving it in Indexed mode with 16 or 64 index values. You can change
the mode via menu item Image > mode.
JPG File Size
I often need to mark up a photo/picture JPG file in Inkscape such as adding texts and drawing lines. Inkscape can’t export a JPG file directly. Sometime the exported PNG file from Inkscape has a much larger file size (4mb to 20mb).
GIMP can open the SVG file directly, and export to a JPG file. The JGP from GIMP could have a smaller size. The file size reduced from about 4mb to 2mb.
This article will be continuously updated (last update: 4/2/2021).